Offering woodworking tutorials, project inspiration, and tips from an experienced carpenter’s perspective.

Saturday, 25 January 2025

How to Build a Tabletop Shuffleboard with Custom Scoring Zones

Build Your Dream Tabletop Shuffleboard with Custom Scoring Zones

Tired of the same old game night? Elevate your entertainment with a custom-built tabletop shuffleboard! This detailed guide walks you through creating your own unique game, complete with personalized scoring zones. Get ready to unleash your creativity and build a game that reflects your personal style.

Gathering Your Materials: A Foundation for Fun

Before you dive into the exciting construction phase, gather all the necessary materials. This ensures a smooth and efficient building process. Don’t rush this step; having everything prepared beforehand will save you valuable time and frustration later. Here's what you'll need:

  • A sturdy wooden board: Choose a board that’s long enough for your desired playing area (at least 4 feet is recommended). Plywood works well, offering a good balance of strength and affordability. Consider the thickness carefully; a thicker board provides more stability and durability.
  • Wood stain or paint: Personalize your shuffleboard with your favorite color or finish. Choose a durable option that can withstand regular play.
  • Sandpaper (various grits): Sanding is crucial for a smooth playing surface. Start with a coarser grit to remove imperfections and finish with a finer grit for a flawless feel.
  • Shuffleboard pucks (weights): Select pucks that are appropriately sized and weighted for your tabletop shuffleboard dimensions. Experiment with different weights for your personal preference.
  • Finishing wax or sealant: Protect your beautifully crafted shuffleboard from scratches and spills with a high-quality finish. This ensures longevity and preserves its aesthetic appeal.
  • Measuring tape, pencil, and saw: These are essential for precise cuts and measurements throughout the construction process.
  • Optional: Custom scoring zone materials: This could include paint, stencils, inlaid wood, or even small metallic markers. Let your imagination run wild!

Constructing the Shuffleboard: A Step-by-Step Guide

Preparing the Playing Surface

Begin by carefully sanding the wooden board. Start with a coarser grit sandpaper to remove any imperfections or rough spots. Gradually move to finer grits for an increasingly smooth surface. This meticulous sanding ensures the pucks glide effortlessly across the playing area, enhancing the game's enjoyment.

Creating Custom Scoring Zones

Now for the fun part! Design your custom scoring zones. Use a pencil to lightly sketch out your design on the board. You can create traditional scoring zones, or get creative with unique shapes and point values. Remember to consider the placement of the zones to balance the gameplay challenge. Once you’re happy with your design, carefully paint or apply your chosen materials to create the scoring zones. Allow ample drying time before proceeding.

Applying the Finish

Once your scoring zones are completely dry, apply your chosen finish (wax or sealant) to protect the board. Apply several thin coats, allowing each coat to dry completely before applying the next. This step not only protects the wood but also provides a smooth playing surface for optimal puck movement.

Adding the Finishing Touches: Elevating Your Game

With the main construction complete, add those special touches that make your shuffleboard truly unique. Consider adding felt or rubber bumpers to the sides to prevent pucks from bouncing off. You could also create a custom base for the board, perhaps adding legs or feet for better stability and elevation. Let your creativity guide you in these final stages!

Enjoy Your Custom Tabletop Shuffleboard!

Congratulations! You’ve successfully built a one-of-a-kind tabletop shuffleboard with custom scoring zones. Now gather your friends and family, and get ready for hours of fun and friendly competition. Remember to adjust the rules based on your custom scoring system and enjoy your unique creation!

Share:

DIY Kitchen Cutting Board Design for Beginners

Craft Your Dream Cutting Board: A Beginner's Guide

Tired of boring, generic cutting boards? Yearning to unleash your inner artisan? This guide walks you through creating a stunning, personalized cutting board, perfect for your kitchen and a fantastic gift for friends and family. No prior woodworking experience is necessaryâ€"we'll navigate each step together, ensuring a rewarding and enjoyable crafting experience.

Choosing Your Materials: The Foundation of Your Masterpiece

The beauty of a DIY cutting board lies in the customization. You get to choose the wood, the size, and even add decorative elements. For beginners, we recommend using readily available hardwoods like maple, cherry, or walnut. These woods are durable, relatively easy to work with, and offer beautiful grain patterns. Avoid softwoods like pine, as they're more prone to scratches and damage. Consider the following:

Wood Selection:

  • Hardwoods: Maple (light and bright), Cherry (rich reddish-brown), Walnut (dark and luxurious).
  • Thickness: Aim for at least 1 inch thick for stability and durability. Thicker boards are more resistant to warping.
  • Size: Start with a manageable size, perhaps 12" x 15". You can always make larger ones later!

Source your wood from a local lumberyard or home improvement store. Ensure the wood is properly dried to prevent warping and cracking during the crafting process.

Tools and Preparation: Gathering Your Arsenal

Before you dive into the creative process, ensure you have the necessary tools. This project doesn't require an extensive collection; a few essential items will suffice. Safety is paramount, so wear safety glasses throughout the project.

Essential Tools:

  • Circular saw or hand saw: To cut the wood to your desired size.
  • Sandpaper (various grits): Starting with coarser grits (like 80) and moving to finer grits (like 220) for a smooth finish.
  • Wood glue: For creating a multi-wood cutting board (optional).
  • Clamps: To hold pieces together while the glue dries (if gluing multiple wood pieces).
  • Mineral oil or cutting board oil: To finish and condition the wood.
  • Measuring tape and pencil: For accurate measurements and marking.

Once you've gathered your tools, carefully measure and cut your wood to your chosen dimensions. Remember to account for any desired bevels or edges. Take your time and make precise cuts for a professional-looking result.

Finishing Touches: Bringing Your Vision to Life

Sanding is key to achieving a smooth, professional finish. Start with coarser sandpaper to remove any rough edges and gradually transition to finer grits for a silky smooth surface. After sanding, apply your chosen wood finish. Mineral oil is a popular and food-safe choice, offering natural protection and enhancing the wood's natural beauty. Apply several coats, allowing each coat to dry thoroughly before applying the next.

Finishing Techniques:

  • Sanding: Sand in the direction of the wood grain to avoid scratches.
  • Oil Application: Apply a thin, even coat using a cloth or brush. Wipe off excess oil.
  • Drying Time: Allow the oil to cure completely before using your cutting board.

Once the oil has cured, admire your handiwork! You've successfully created a beautiful, functional, and personalized cutting board, ready to grace your kitchen counter. Remember to hand-wash your creation to maintain its beauty and longevity.

Share:

Wednesday, 20 November 2024

Affordable Bath Tray Woodworking Projects That Sell

Affordable Bath Tray Woodworking Projects That Sell

Affordable Bath Tray Woodworking Projects That Sell

In the world of woodworking, finding a project that's both appealing to customers and financially viable is key. Bath trays, with their blend of functionality and aesthetic appeal, present an excellent opportunity. This article delves into crafting affordable, sellable bath tray woodworking projects, providing insights into design, materials, and marketing.

Defining the Target Market

Before embarking on any project, understanding your target audience is crucial. Bath trays cater to a wide range of individuals, but pinpointing your niche will guide design decisions:

Minimalist Aesthetes

These individuals appreciate clean lines and natural wood tones. Opt for simple, geometric designs, using hardwoods like walnut or maple. A natural oil finish enhances the wood's beauty without obscuring its grain.

Rustic Lovers

Reclaimed wood, knotty pine, or even distressed hardwoods appeal to this group. Embrace the imperfections, using a natural or dark stain to highlight the wood's character. Consider adding metal accents like handles or brackets for a rustic touch.

Trendy Consumers

Stay current with popular design trends. Consider incorporating acrylic inserts for a modern feel, or using vibrant, contrasting stains. Experiment with different wood species for a unique look.

Choosing the Right Materials

Material selection plays a significant role in both the cost and appeal of your bath tray. Here are some options:

Wood Species

  • Pine: Affordable and readily available, pine is lightweight and easy to work with. It lends itself to rustic and farmhouse aesthetics.
  • Maple: A classic choice known for its durability and beautiful grain patterns. Maple is slightly more expensive than pine but offers a more refined look.
  • Walnut: A luxurious hardwood with stunning dark grain. Walnut is pricier but offers a rich, sophisticated appeal.
  • Reclaimed Wood: Gives your bath tray a unique character and eco-friendly appeal. However, finding and working with reclaimed wood can be challenging and may require specialized techniques.

Hardware and Finishes

  • Handles: Choose handles that are comfortable to grip and complement the overall design. Metal, leather, or even rope can be incorporated for a distinct look.
  • Stands: Some bath trays benefit from stands for added stability. Metal, wood, or acrylic stands provide a range of styles.
  • Finishes: Natural oil finishes enhance the wood's beauty, while stains add color and depth. Consider using water-based finishes for a safe and durable option.

Design Considerations for Functionality and Appeal

A well-designed bath tray prioritizes functionality while maintaining an attractive aesthetic:

Size and Proportions

The tray should be large enough to accommodate essentials like books, a tablet, a glass of wine, and candles. Consider the average bathtub size and ensure the tray fits comfortably across the tub's edge.

Compartments and Dividers

Incorporating compartments or dividers enhances the tray's organization. Dedicated slots for a phone, wine glass, or candles add practicality and visual interest.

Stability and Safety

The tray should be stable and secure, preventing spills and accidents. Use durable wood and sturdy hardware. Consider adding rubber feet or a non-slip coating for added safety.

Marketing and Pricing Strategies

Attracting customers and selling your bath trays effectively requires a thoughtful marketing strategy:

Online Marketplaces

Platforms like Etsy, Amazon Handmade, and Shopify offer a wide audience and potential for reaching global buyers. High-quality product photography and detailed descriptions are crucial for attracting interest.

Local Craft Fairs and Markets

Participating in local events allows direct interaction with potential customers and provides an opportunity to showcase your work. Offering personalized touches like engraving or custom finishes can attract attention.

Social Media Marketing

Establish a presence on platforms like Instagram and Pinterest, where visually appealing content can attract a large following. Share your crafting process, showcase finished products, and run promotions to drive sales.

Pricing Your Products

Determine your pricing based on the cost of materials, labor, and your desired profit margin. Research competitor prices and consider offering a range of products at varying price points to cater to different budgets.

Cost-Effective Tips for Production

Keeping production costs down is crucial for maximizing profit margins:

Efficient Material Use

Plan your designs carefully to minimize waste. Use leftover wood for smaller projects or donate it to local art centers.

Bulk Purchasing

Purchase materials in bulk whenever possible to secure better pricing. This can apply to wood, hardware, finishes, and packaging supplies.

Simple Designs

While intricate designs can be attractive, simpler designs often require less time and materials, translating to lower production costs.

Conclusion

Creating affordable bath trays that sell requires a blend of creativity, practicality, and sound business sense. By understanding your target market, selecting appropriate materials, designing functional and appealing pieces, and implementing effective marketing strategies, you can turn your woodworking skills into a profitable venture. Remember to continuously learn, adapt to market trends, and prioritize quality and customer satisfaction to ensure long-term success.

Share:

Tuesday, 19 November 2024

Profitable Wine Rack Projects for Woodworking Sellers

Profitable Wine Rack Projects for Woodworking Sellers

Profitable Wine Rack Projects for Woodworking Sellers

Are you a woodworking enthusiast looking to turn your passion into a profitable business? Wine racks are a fantastic product to sell, appealing to a wide audience with varying tastes and budgets. With the right designs and materials, you can create stunning wine racks that will be the envy of any wine lover. This article delves into the world of profitable wine rack projects, providing insights and inspiration for woodworking sellers.

Identifying the Target Market

Before diving into specific designs, it's crucial to understand your target market. Consider the following factors:

Wine Collection Size:

Will your customers be casual wine drinkers with a small collection or serious collectors with hundreds of bottles? This determines the size and capacity of the wine rack.

Space Constraints:

Will your customers have ample space for a large, freestanding wine rack or need a more compact, wall-mounted solution?

Aesthetic Preferences:

Do your customers prefer a rustic, modern, or traditional style? Understanding their aesthetic preferences helps you choose the right wood species, finish, and design elements.

Popular Wine Rack Designs

Once you have a clear understanding of your target market, it's time to explore popular wine rack designs:

Freestanding Wine Racks:

  • Traditional Wine Racks: Classic, freestanding designs often feature multiple shelves and decorative elements. These are popular for larger collections and can be customized with different wood species, stains, and finishes.
  • Modern Wine Racks: Contemporary styles often showcase clean lines, geometric shapes, and minimal detailing. These are ideal for modern homes and can be made from various materials like metal and glass.
  • Rustic Wine Racks: These racks offer a charming, handcrafted appeal, often featuring reclaimed wood, distressed finishes, and natural elements like branches or bark. They complement farmhouse or rustic decor.

Wall-Mounted Wine Racks:

  • Floating Shelves: Simple yet effective, these racks offer a sleek and modern look. They are ideal for smaller spaces and can be customized with different wood species and finishes.
  • Rack & Bottle Holders: These versatile racks can be mounted on walls or placed on counters. They come in various shapes and sizes, allowing for flexible storage solutions.
  • Metal Wine Racks: Modern and durable, metal wine racks are available in various finishes and styles. They often feature minimalist designs and can complement a variety of decor.

Materials and Finishes

Choosing the right materials and finishes is essential for creating high-quality wine racks that will stand the test of time.

Wood Species:

Consider using hardwood species like oak, maple, walnut, or cherry for durability and beauty. These woods offer a variety of grain patterns and natural colors.

Finishes:

From natural oils and stains to paints and varnishes, you have a wide range of finishes to choose from. Consider using finishes that enhance the natural beauty of the wood while protecting it from spills and moisture.

Marketing and Sales Strategies

To succeed in the wine rack market, you need to create a strong marketing strategy. Here are some effective approaches:

Online Presence:

Build an online shop on platforms like Etsy, Shopify, or your own website. High-quality product photos and detailed descriptions are essential for attracting customers.

Social Media Marketing:

Utilize social media platforms like Instagram, Facebook, and Pinterest to showcase your creations, engage with potential customers, and run targeted ads.

Local Events and Markets:

Participate in craft fairs, farmers markets, and wine-related events to connect with potential customers in person.

Conclusion

Wine racks are a profitable and rewarding woodworking project, offering a diverse range of designs, materials, and finishes. By understanding your target market, choosing popular designs, and implementing effective marketing strategies, you can successfully sell your woodworking creations and turn your passion into a profitable business.

Share:

Holiday DIY: Christmas Woodworking Projects for Beginners

Holiday DIY: Christmas Woodworking Projects for Beginners

Holiday DIY: Christmas Woodworking Projects for Beginners

The holidays are a time for joy, togetherness, and creating beautiful memories. What better way to celebrate than by crafting your own festive decorations? Woodworking offers a fantastic avenue for expressing your creativity and adding a personal touch to your holiday decor. Even if you're a complete beginner, these easy Christmas woodworking projects are perfect for getting you started.

Simple and Stunning Ornaments

Ornaments are a classic Christmas decoration, and they're incredibly versatile. You can choose from various shapes, sizes, and styles to match your personal taste. Here's how to craft some simple, yet striking ornaments:

Wooden Star Ornaments

Start with pre-cut wooden stars, readily available at craft stores. Get creative with paint, glitter, or even decoupage techniques. Use a drill to create a small hole at the top for a string or ribbon to hang the ornament.

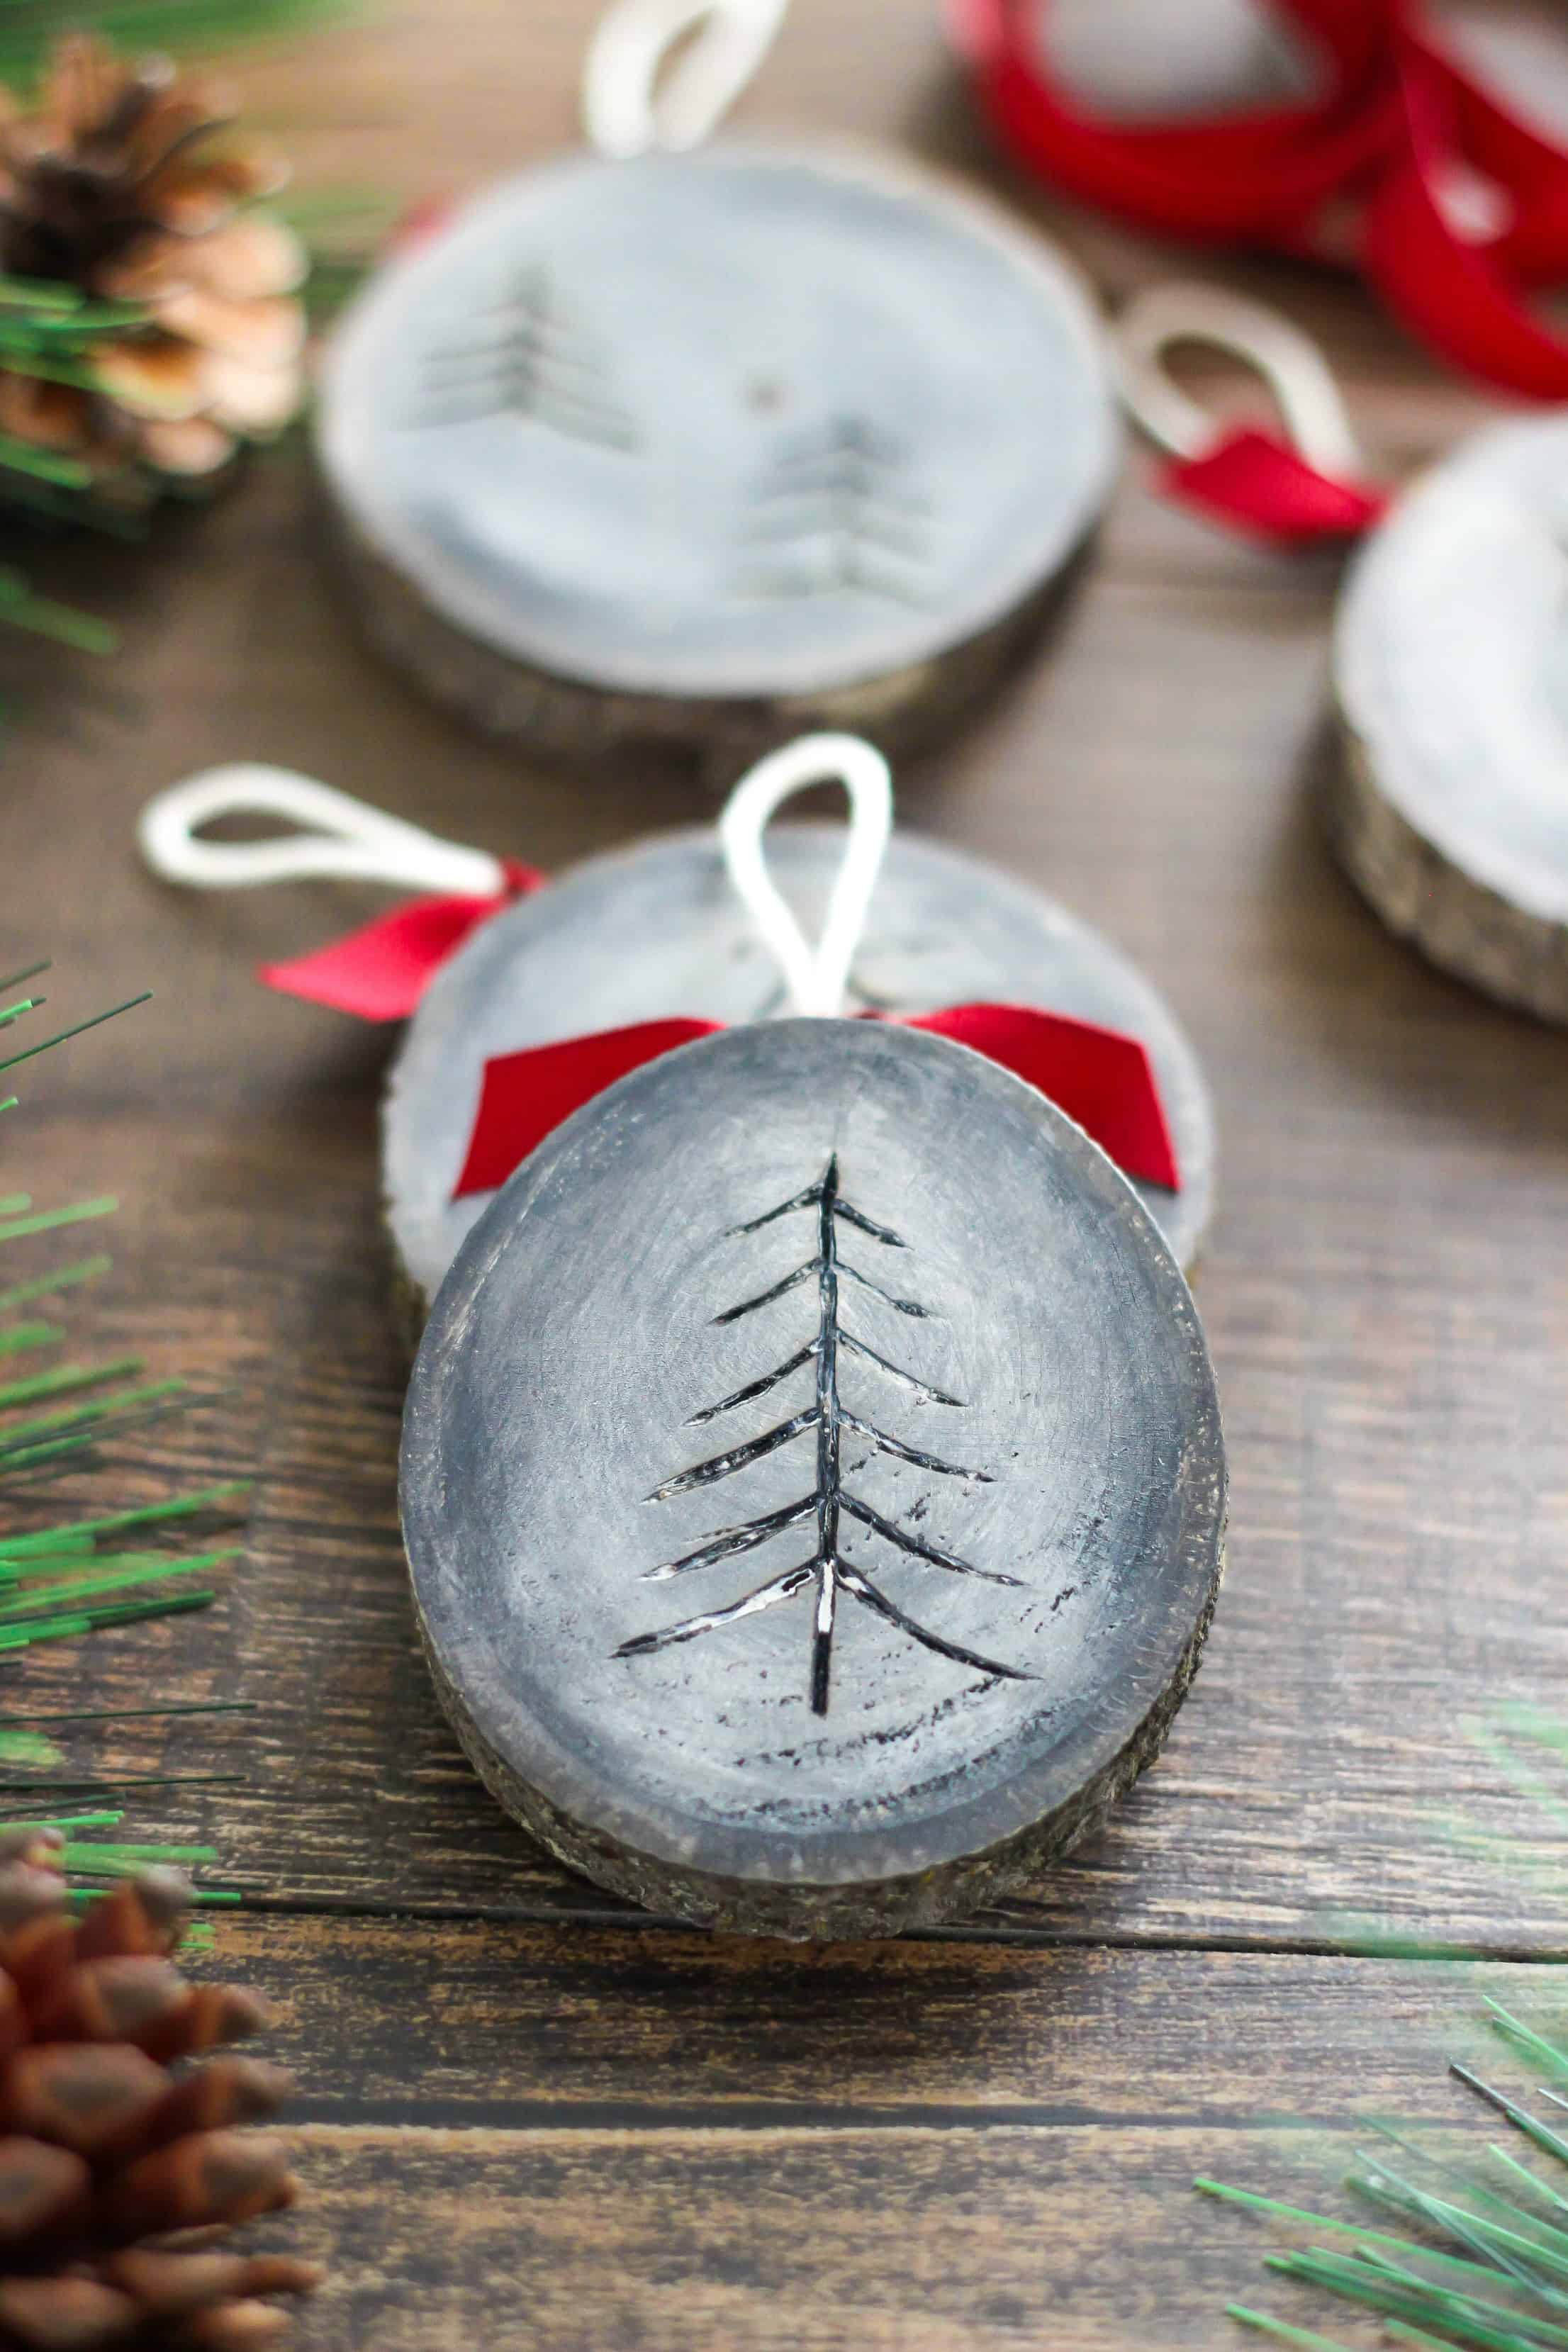
Rustic Wooden Slice Ornaments

Gather some thin wood slices, either from a local lumberyard or a craft store. Sand the slices smooth, then paint, stain, or leave them natural. Attach a string or ribbon with a hot glue gun.

Charming Wooden Christmas Trees

Wooden Christmas trees add a rustic and whimsical touch to any holiday setting. These are incredibly easy to make and can be customized with various sizes and decorations:

Standing Wooden Trees

Cut out triangle shapes from plywood or MDF. Sand the edges and paint or stain them. You can create a simple stand by attaching a small piece of wood to the base.

Miniature Wooden Trees

Use small wooden dowels as the trunk and create a layered cone shape with thin wood slices or felt for the tree. Glue them together and paint to complete the look.

Practical and Festive Wooden Accessories

Beyond decorations, you can also craft functional wooden accessories to enhance your holiday festivities. Here are a couple of ideas:

Wooden Gift Tags

Cut out small rectangular shapes from plywood or MDF. Sand the edges and personalize them with paint, carving, or even by burning your initials using a wood-burning tool.

Wooden Serving Tray

For a more ambitious project, create a beautiful wooden serving tray for holiday snacks or appetizers. You can use pre-cut boards from a craft store or find a suitable piece of wood at a lumberyard. Remember to sand the edges carefully and apply a protective finish for durability.

Essential Tips for Beginner Woodworkers

Don't worry if you've never picked up a saw before. These tips will help you navigate the world of woodworking as a beginner:

  • Start with simple projects. Choose projects that require minimal tools and skills, like ornaments or simple wooden trees. You can build confidence and skills as you progress.
  • Invest in basic tools. A saw, a hammer, sandpaper, and a drill are essential for most woodworking projects. You can find basic tools at a local hardware store or online.
  • Practice safety first. Always wear safety goggles and protective gloves. Learn how to use each tool properly and follow safety guidelines.
  • Seek inspiration online. Browse through online woodworking tutorials and blogs for project ideas, tips, and tricks. You'll find plenty of resources tailored for beginners.

Woodworking is a rewarding and enjoyable hobby, and it's a great way to create beautiful, personalized gifts and decorations for the holidays. Don't be afraid to experiment and have fun with these DIY projects. Happy crafting!

Share:

Monday, 18 November 2024

DIY Wine Rack Designs That Are Sure to Sell Fast

DIY Wine Rack Designs That Are Sure to Sell Fast

DIY Wine Rack Designs That Are Sure to Sell Fast

Hey there, fellow wine enthusiasts! You know the struggle â€" you've got a growing collection of bottles, but your cabinet space is shrinking faster than your wallet after a trip to the liquor store. Fear not, my friends! We're about to dive into the world of DIY wine racks. Not only are these projects a fun way to unleash your inner craftsman, but they can also become a hot commodity in the world of handmade goods.

Think about it: who doesn't love a good bottle of wine and a unique, handcrafted piece to store it in? We're talking about the kind of DIY projects that will have people saying, "Wow, you made this? I NEED it!"

Ready to turn your passion for wine and woodworking into a lucrative side hustle? Let's get started!

The Essential Ingredients

Before we dive into the designs, let's talk about the essentials you'll need to whip up these wine-worthy creations.

Wood, Glorious Wood

The foundation of your wine rack is wood, and there's a whole buffet of options out there. Here's a breakdown of the most popular choices:

  • Pine: Affordable, lightweight, and easy to work with, pine is a great option for beginners. It's also readily available at most home improvement stores.
  • Redwood: Known for its natural resistance to moisture, redwood is perfect for outdoor wine racks or those that will be exposed to humidity. Plus, it has a lovely, reddish-brown color that adds warmth.
  • Oak: A classic choice for wine racks, oak is durable, strong, and boasts a rich, natural grain. Be prepared for a slightly higher price tag.
  • Reclaimed Wood: For those who appreciate rustic charm and sustainable practices, reclaimed wood is a fantastic option. It adds character and a story to your wine rack.

Tools of the Trade

You'll need some basic tools to bring your wine rack dreams to life:

  • Saw: A circular saw or miter saw is essential for cutting the wood to size. A jigsaw is useful for creating intricate shapes or curves.
  • Drill: You'll need a drill for making pilot holes before driving screws and for attaching hardware.
  • Screwdriver: A good cordless drill with a selection of bits is always handy.
  • Sandpaper: Smooth out any rough edges and imperfections for a polished finish. Different grit levels will help you achieve the desired smoothness.
  • Clamps: These help secure your wood pieces while assembling your wine rack.
  • Measuring Tape and Level: Ensure your cuts are accurate and your rack is straight and sturdy.

Wine Rack Designs That Will Fly Off the Shelves

Now, onto the fun part â€" the designs! Let's explore some DIY wine rack ideas that are sure to impress and sell quickly.

The Classic Wall-Mounted Wine Rack

This design is a timeless favorite â€" simple, elegant, and easy to build. It's perfect for smaller spaces or those who prefer their wine collection on display.

  • Materials: Wooden boards (1x4, 1x6, or 1x8 depending on your preference), wood screws, finishing nails, stain or paint (optional).
  • Instructions: Cut your wooden boards to the desired length and width. Drill pilot holes for the screws, then assemble the boards to create a series of shelves. Attach the shelves to the wall using sturdy brackets or anchors. Sand, stain, or paint to your liking.

The Rustic Ladder Wine Rack

This design gives off a farmhouse chic vibe. It's perfect for those who love a little vintage charm. You can use an actual ladder or build a ladder-style frame for a more polished look.

  • Materials: Wooden ladder or lumber to build a ladder-style frame, wooden shelves or supports, screws, brackets, stain or paint (optional).
  • Instructions: If using an actual ladder, attach shelves or supports to create spaces for your wine bottles. If building a frame, construct the ladder structure and attach the shelves. Sand, stain, or paint for a personalized touch.

The Industrial Pipe Wine Rack

For a modern and industrial look, this design is hard to beat. The contrast between the metal pipe and the wood creates a visually striking piece.

  • Materials: Industrial pipe fittings (flanges, elbows, nipples), wooden shelves or supports, screws, stain or paint (optional).
  • Instructions: Assemble the pipe framework according to your design. Attach the wooden shelves or supports to the pipe using appropriate hardware. Sand, stain, or paint for a cohesive look.

The Wine Bottle Wall Display

This design is perfect for those who want to showcase their entire collection! It's also a great space-saving option, especially for smaller kitchens or dining areas.

  • Materials: Wine bottle holders (metal, wood, or acrylic), screws, stain or paint (optional).
  • Instructions: Attach the wine bottle holders to the wall in a pattern that you like. You can create a grid, a diagonal pattern, or a more organic arrangement. Sand, stain, or paint for a unified look.

The Countertop Wine Rack

A small but stylish addition to your kitchen or bar, a countertop wine rack is perfect for displaying a few select bottles. It's great for showcasing special occasion wines or those that you want to grab quickly.

  • Materials: Small wooden box, wine bottle holders, screws, stain or paint (optional).
  • Instructions: Attach the wine bottle holders inside the box. You can arrange them in a variety of ways, creating a vertical or horizontal display. Sand, stain, or paint the box for a personalized touch.

Unleash Your Inner Artist: Personalizing Your Creations

Once you've chosen your design, it's time to add your own personal flair. Here are some ideas to make your wine rack stand out:

  • Staining and Painting: Enhance the wood's natural beauty with a stain or give it a vibrant pop of color with paint. Experiment with different colors, finishes, and techniques for a unique look.
  • Metal Accents: Add industrial chic with metal hardware like pipe fittings or brackets. These can be painted or left in their natural state for a rustic feel.
  • Embellishments: Get creative with embellishments like bottle stoppers, wine charms, or even vintage corkscrews for a touch of whimsy.
  • Wine-Themed Decals: Add a touch of whimsy with wine-themed decals. You can find a variety of options online, from playful grapes and vines to sophisticated wine labels.

Tips for Selling Your Wine Rack Creations

Now that you've crafted a masterpiece, let's talk about getting it into the hands of eager wine lovers! Here are some tips for marketing and selling your DIY wine racks:

  • Online Marketplaces: Platforms like Etsy, Facebook Marketplace, and Craigslist offer a wide audience for your handmade goods. Take high-quality photos of your creations and write compelling descriptions highlighting the unique features and craftsmanship.
  • Local Craft Fairs and Events: Get your wine racks out there! Participate in local craft fairs, farmers markets, and wine festivals. It's a great opportunity to showcase your work and interact with potential customers.
  • Social Media: Build a following on platforms like Instagram and Pinterest by sharing your crafting process, showcasing your creations, and engaging with wine lovers. Use relevant hashtags to reach a wider audience.
  • Word-of-Mouth: Don't underestimate the power of word-of-mouth. Talk to friends, family, and local businesses about your wine racks. Offer discounts or incentives for referrals.

Commonly Asked Questions

Here are answers to some frequently asked questions about DIY wine racks:

What are the best materials to use for a DIY wine rack?

Pine, redwood, and oak are all popular choices. Pine is budget-friendly, redwood is moisture-resistant, and oak offers a classic look and durability.

How much do DIY wine racks typically sell for?

Prices vary depending on the design, materials, and craftsmanship. You can expect to sell them for anywhere from $50 to $200 or more. Research the market and consider your costs when setting prices.

Do I need any special skills to build a wine rack?

No, you don't need to be a seasoned woodworker! Many simple designs are beginner-friendly. Start with a basic project and gradually increase the complexity as you gain confidence.

Remember, the key is to have fun and experiment! Get creative with your designs, and soon you'll have a booming business filled with happy wine enthusiasts who appreciate your handcrafted creations. Cheers to your success!

Share:

Wednesday, 13 November 2024

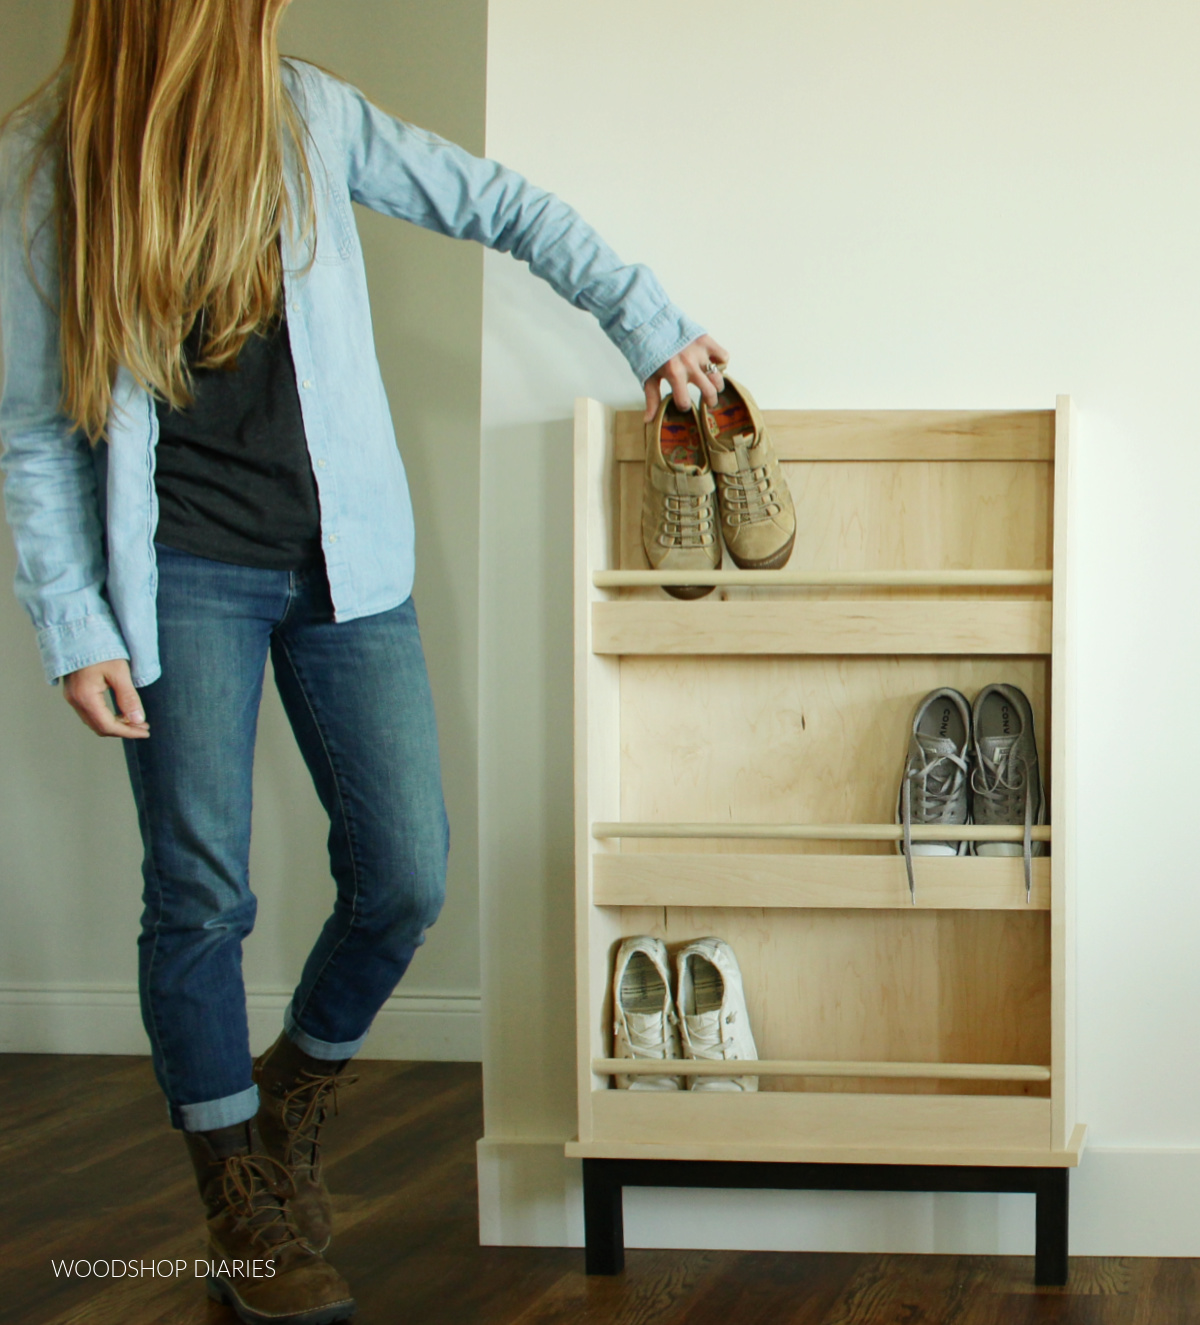
How to Build a Shoe Rack with a Unique Design to Stand Out

How to Build a Shoe Rack with a Unique Design to Stand Out

Build a Shoe Rack with a Unique Design That Will Turn Heads

Tired of tripping over shoes scattered across your entryway? Dreaming of a stylish and functional shoe storage solution? Building a unique shoe rack is the perfect way to tackle clutter and add a personal touch to your home. With a little creativity and some basic woodworking skills, you can craft a shoe rack that reflects your style and makes a statement.

Choosing a Design That Stands Out

Forget boring, generic shoe racks. Let's think outside the box and create something truly extraordinary. Here are a few ideas to spark your imagination:

Geometric Shapes

Embrace bold angles and geometric shapes. Consider a hexagonal or octagonal rack, or even a curved, flowing design. Experiment with different materials like metal tubing or reclaimed wood to add a modern edge.

Industrial Chic

Embrace the raw beauty of industrial style. Utilize exposed metal pipes, distressed wood, and vintage hardware. Think open shelving with metal brackets or a reclaimed wood frame with metal mesh panels.

Rustic Charm

Create a cozy and inviting space with a rustic shoe rack. Use reclaimed barn wood, aged metal, or weathered brick for a timeless look. Consider adding a decorative touch with rope, leather, or even repurposed barn doors.

Essential Materials and Tools

Once you've chosen a design, gather the necessary materials and tools:

  • Wood (choose sturdy lumber like pine or oak)
  • Metal brackets or supports (for shelving)
  • Hardware (screws, nails, hinges, etc.)
  • Wood glue
  • Measuring tape and level
  • Saw (circular, jigsaw, or hand saw)
  • Drill and drill bits
  • Sander (optional, for a smooth finish)
  • Stain or paint (optional, for color and protection)

Step-by-Step Construction Guide

Let's get building! Here's a general guide for constructing your unique shoe rack:

  1. Design and Plan: Sketch out your design and create a detailed plan with precise measurements. Determine the size, shape, and number of shelves you need.
  2. Cut Wood: Use your saw to cut the wood pieces according to your plan. Ensure all cuts are accurate and square.
  3. Assemble the Frame: Join the wood pieces together using wood glue and screws to form the basic frame of your shoe rack. Use clamps to secure joints while the glue dries.
  4. Add Shelves: Attach the shelves to the frame using metal brackets or supports. Ensure the shelves are level and sturdy.
  5. Finishing Touches: Sand any rough edges, then apply stain or paint if desired. Let the finish dry completely.
  6. Install and Organize: Place your shoe rack in its designated spot and arrange your shoes. Consider using shoe dividers or organizers to keep your collection tidy.

Personalize Your Shoe Rack

Now it's time to add your personal touch! Consider these ideas:

  • Unique Hardware: Use decorative hinges, knobs, or drawer pulls to elevate the design.
  • Lighting: Add accent lighting for a dramatic effect. Try LED strips or small sconces.
  • Plants: Add a touch of greenery with small plants placed on top of the shoe rack.
  • Storage Solutions: Integrate storage bins or baskets for accessories like hats, gloves, or scarves.

With creativity and a little effort, you can build a unique shoe rack that not only serves a practical purpose but also adds a touch of personality to your home. So, get those tools ready, and let your imagination run wild!

Share:

Search This Blog

Powered by Blogger.

Pages