Offering woodworking tutorials, project inspiration, and tips from an experienced carpenter’s perspective.

Monday, 18 November 2024

DIY Wine Rack Designs That Are Sure to Sell Fast

DIY Wine Rack Designs That Are Sure to Sell Fast

DIY Wine Rack Designs That Are Sure to Sell Fast

Hey there, fellow wine enthusiasts! You know the struggle â€" you've got a growing collection of bottles, but your cabinet space is shrinking faster than your wallet after a trip to the liquor store. Fear not, my friends! We're about to dive into the world of DIY wine racks. Not only are these projects a fun way to unleash your inner craftsman, but they can also become a hot commodity in the world of handmade goods.

Think about it: who doesn't love a good bottle of wine and a unique, handcrafted piece to store it in? We're talking about the kind of DIY projects that will have people saying, "Wow, you made this? I NEED it!"

Ready to turn your passion for wine and woodworking into a lucrative side hustle? Let's get started!

The Essential Ingredients

Before we dive into the designs, let's talk about the essentials you'll need to whip up these wine-worthy creations.

Wood, Glorious Wood

The foundation of your wine rack is wood, and there's a whole buffet of options out there. Here's a breakdown of the most popular choices:

  • Pine: Affordable, lightweight, and easy to work with, pine is a great option for beginners. It's also readily available at most home improvement stores.
  • Redwood: Known for its natural resistance to moisture, redwood is perfect for outdoor wine racks or those that will be exposed to humidity. Plus, it has a lovely, reddish-brown color that adds warmth.
  • Oak: A classic choice for wine racks, oak is durable, strong, and boasts a rich, natural grain. Be prepared for a slightly higher price tag.
  • Reclaimed Wood: For those who appreciate rustic charm and sustainable practices, reclaimed wood is a fantastic option. It adds character and a story to your wine rack.

Tools of the Trade

You'll need some basic tools to bring your wine rack dreams to life:

  • Saw: A circular saw or miter saw is essential for cutting the wood to size. A jigsaw is useful for creating intricate shapes or curves.
  • Drill: You'll need a drill for making pilot holes before driving screws and for attaching hardware.
  • Screwdriver: A good cordless drill with a selection of bits is always handy.
  • Sandpaper: Smooth out any rough edges and imperfections for a polished finish. Different grit levels will help you achieve the desired smoothness.
  • Clamps: These help secure your wood pieces while assembling your wine rack.
  • Measuring Tape and Level: Ensure your cuts are accurate and your rack is straight and sturdy.

Wine Rack Designs That Will Fly Off the Shelves

Now, onto the fun part â€" the designs! Let's explore some DIY wine rack ideas that are sure to impress and sell quickly.

The Classic Wall-Mounted Wine Rack

This design is a timeless favorite â€" simple, elegant, and easy to build. It's perfect for smaller spaces or those who prefer their wine collection on display.

  • Materials: Wooden boards (1x4, 1x6, or 1x8 depending on your preference), wood screws, finishing nails, stain or paint (optional).
  • Instructions: Cut your wooden boards to the desired length and width. Drill pilot holes for the screws, then assemble the boards to create a series of shelves. Attach the shelves to the wall using sturdy brackets or anchors. Sand, stain, or paint to your liking.

The Rustic Ladder Wine Rack

This design gives off a farmhouse chic vibe. It's perfect for those who love a little vintage charm. You can use an actual ladder or build a ladder-style frame for a more polished look.

  • Materials: Wooden ladder or lumber to build a ladder-style frame, wooden shelves or supports, screws, brackets, stain or paint (optional).
  • Instructions: If using an actual ladder, attach shelves or supports to create spaces for your wine bottles. If building a frame, construct the ladder structure and attach the shelves. Sand, stain, or paint for a personalized touch.

The Industrial Pipe Wine Rack

For a modern and industrial look, this design is hard to beat. The contrast between the metal pipe and the wood creates a visually striking piece.

  • Materials: Industrial pipe fittings (flanges, elbows, nipples), wooden shelves or supports, screws, stain or paint (optional).
  • Instructions: Assemble the pipe framework according to your design. Attach the wooden shelves or supports to the pipe using appropriate hardware. Sand, stain, or paint for a cohesive look.

The Wine Bottle Wall Display

This design is perfect for those who want to showcase their entire collection! It's also a great space-saving option, especially for smaller kitchens or dining areas.

  • Materials: Wine bottle holders (metal, wood, or acrylic), screws, stain or paint (optional).
  • Instructions: Attach the wine bottle holders to the wall in a pattern that you like. You can create a grid, a diagonal pattern, or a more organic arrangement. Sand, stain, or paint for a unified look.

The Countertop Wine Rack

A small but stylish addition to your kitchen or bar, a countertop wine rack is perfect for displaying a few select bottles. It's great for showcasing special occasion wines or those that you want to grab quickly.

  • Materials: Small wooden box, wine bottle holders, screws, stain or paint (optional).
  • Instructions: Attach the wine bottle holders inside the box. You can arrange them in a variety of ways, creating a vertical or horizontal display. Sand, stain, or paint the box for a personalized touch.

Unleash Your Inner Artist: Personalizing Your Creations

Once you've chosen your design, it's time to add your own personal flair. Here are some ideas to make your wine rack stand out:

  • Staining and Painting: Enhance the wood's natural beauty with a stain or give it a vibrant pop of color with paint. Experiment with different colors, finishes, and techniques for a unique look.
  • Metal Accents: Add industrial chic with metal hardware like pipe fittings or brackets. These can be painted or left in their natural state for a rustic feel.
  • Embellishments: Get creative with embellishments like bottle stoppers, wine charms, or even vintage corkscrews for a touch of whimsy.
  • Wine-Themed Decals: Add a touch of whimsy with wine-themed decals. You can find a variety of options online, from playful grapes and vines to sophisticated wine labels.

Tips for Selling Your Wine Rack Creations

Now that you've crafted a masterpiece, let's talk about getting it into the hands of eager wine lovers! Here are some tips for marketing and selling your DIY wine racks:

  • Online Marketplaces: Platforms like Etsy, Facebook Marketplace, and Craigslist offer a wide audience for your handmade goods. Take high-quality photos of your creations and write compelling descriptions highlighting the unique features and craftsmanship.
  • Local Craft Fairs and Events: Get your wine racks out there! Participate in local craft fairs, farmers markets, and wine festivals. It's a great opportunity to showcase your work and interact with potential customers.
  • Social Media: Build a following on platforms like Instagram and Pinterest by sharing your crafting process, showcasing your creations, and engaging with wine lovers. Use relevant hashtags to reach a wider audience.
  • Word-of-Mouth: Don't underestimate the power of word-of-mouth. Talk to friends, family, and local businesses about your wine racks. Offer discounts or incentives for referrals.

Commonly Asked Questions

Here are answers to some frequently asked questions about DIY wine racks:

What are the best materials to use for a DIY wine rack?

Pine, redwood, and oak are all popular choices. Pine is budget-friendly, redwood is moisture-resistant, and oak offers a classic look and durability.

How much do DIY wine racks typically sell for?

Prices vary depending on the design, materials, and craftsmanship. You can expect to sell them for anywhere from $50 to $200 or more. Research the market and consider your costs when setting prices.

Do I need any special skills to build a wine rack?

No, you don't need to be a seasoned woodworker! Many simple designs are beginner-friendly. Start with a basic project and gradually increase the complexity as you gain confidence.

Remember, the key is to have fun and experiment! Get creative with your designs, and soon you'll have a booming business filled with happy wine enthusiasts who appreciate your handcrafted creations. Cheers to your success!
Share:

Wednesday, 13 November 2024

How to Build a Shoe Rack with a Unique Design to Stand Out

How to Build a Shoe Rack with a Unique Design to Stand Out

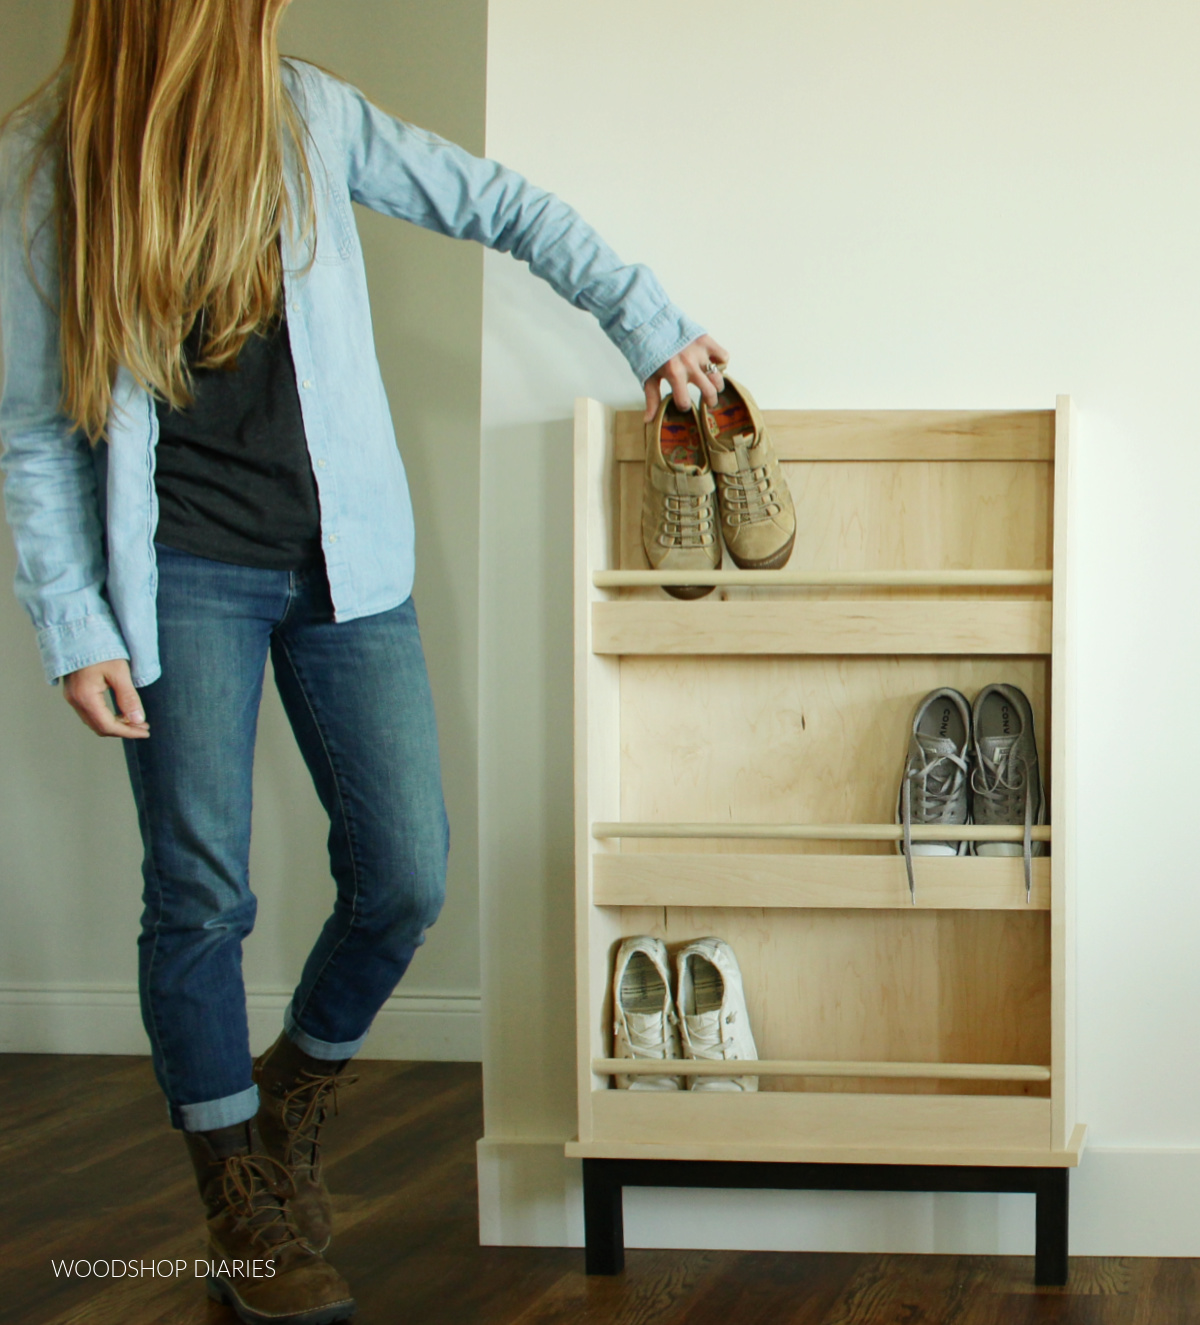
Build a Shoe Rack with a Unique Design That Will Turn Heads

Tired of tripping over shoes scattered across your entryway? Dreaming of a stylish and functional shoe storage solution? Building a unique shoe rack is the perfect way to tackle clutter and add a personal touch to your home. With a little creativity and some basic woodworking skills, you can craft a shoe rack that reflects your style and makes a statement.

Choosing a Design That Stands Out

Forget boring, generic shoe racks. Let's think outside the box and create something truly extraordinary. Here are a few ideas to spark your imagination:

Geometric Shapes

Embrace bold angles and geometric shapes. Consider a hexagonal or octagonal rack, or even a curved, flowing design. Experiment with different materials like metal tubing or reclaimed wood to add a modern edge.

Industrial Chic

Embrace the raw beauty of industrial style. Utilize exposed metal pipes, distressed wood, and vintage hardware. Think open shelving with metal brackets or a reclaimed wood frame with metal mesh panels.

Rustic Charm

Create a cozy and inviting space with a rustic shoe rack. Use reclaimed barn wood, aged metal, or weathered brick for a timeless look. Consider adding a decorative touch with rope, leather, or even repurposed barn doors.

Essential Materials and Tools

Once you've chosen a design, gather the necessary materials and tools:

  • Wood (choose sturdy lumber like pine or oak)
  • Metal brackets or supports (for shelving)
  • Hardware (screws, nails, hinges, etc.)
  • Wood glue
  • Measuring tape and level
  • Saw (circular, jigsaw, or hand saw)
  • Drill and drill bits
  • Sander (optional, for a smooth finish)
  • Stain or paint (optional, for color and protection)

Step-by-Step Construction Guide

Let's get building! Here's a general guide for constructing your unique shoe rack:

  1. Design and Plan: Sketch out your design and create a detailed plan with precise measurements. Determine the size, shape, and number of shelves you need.
  2. Cut Wood: Use your saw to cut the wood pieces according to your plan. Ensure all cuts are accurate and square.
  3. Assemble the Frame: Join the wood pieces together using wood glue and screws to form the basic frame of your shoe rack. Use clamps to secure joints while the glue dries.
  4. Add Shelves: Attach the shelves to the frame using metal brackets or supports. Ensure the shelves are level and sturdy.
  5. Finishing Touches: Sand any rough edges, then apply stain or paint if desired. Let the finish dry completely.
  6. Install and Organize: Place your shoe rack in its designated spot and arrange your shoes. Consider using shoe dividers or organizers to keep your collection tidy.

Personalize Your Shoe Rack

Now it's time to add your personal touch! Consider these ideas:

  • Unique Hardware: Use decorative hinges, knobs, or drawer pulls to elevate the design.
  • Lighting: Add accent lighting for a dramatic effect. Try LED strips or small sconces.
  • Plants: Add a touch of greenery with small plants placed on top of the shoe rack.
  • Storage Solutions: Integrate storage bins or baskets for accessories like hats, gloves, or scarves.

With creativity and a little effort, you can build a unique shoe rack that not only serves a practical purpose but also adds a touch of personality to your home. So, get those tools ready, and let your imagination run wild!

Share:

Wooden Christmas Candle Holder Craft Tutorial

Wooden Christmas Candle Holder Craft Tutorial

DIY Wooden Christmas Candle Holder: A Festive Craft for Your Home

Hey there, crafty friends! Looking for a unique and personalized way to add some festive cheer to your home this Christmas? Well, look no further! Today, we're going to dive into the world of DIY and create a stunning wooden Christmas candle holder that'll be the envy of your neighborhood. Don't worry, it's easier than you think! Even if you're a crafting newbie, this project is totally doable. Grab your tools, let's get festive!

Gather Your Supplies

Before we dive into the fun, let's gather all the goodies we'll need for this festive project. Here's a list of what you'll need:

  • Wooden plank or disc: Choose a size and shape that suits your vision. I'm going for a rustic look, so I'm using a reclaimed wood plank.
  • Drill: Make sure you have a drill bit that's a little larger than the diameter of your candle. You can use a drill press or a handheld drill.
  • Sandpaper: You'll need a variety of grits to smooth out your wood. Start with coarse grit and gradually move to fine grit for a silky smooth finish.
  • Stain: Choose a stain that complements your holiday decor. I'm using a deep walnut stain for a cozy feel.
  • Polyurethane: This will help protect your candle holder and make it last longer. You can use a matte or gloss finish depending on your preference.
  • Candles: Pick your favorite scents and sizes. I'm going for pillar candles with a warm, cinnamon scent.
  • Paintbrush: For applying stain and polyurethane.
  • Protective gloves: To keep those hands clean.
  • Measuring tape: To make sure your candles fit snugly in the holes.
  • Pencil: For marking the placement of your candle holes.
  • Optional: Decorative elements like ribbon, holly sprigs, or pine cones for extra festive flair.

Let's Get Crafting!

Now, let's get our hands dirty and create a magnificent candle holder. Follow these simple steps:

Step 1: Prep the Wood

First, you want to make sure your wood is ready for the spotlight. Sand down any rough edges or splinters using your sandpaper. Start with a coarse grit to get rid of any major imperfections, then gradually move to finer grits for a smooth, polished finish. Remember, the key to a beautiful project is a well-prepared surface.

Step 2: Mark and Drill the Candle Holes

Now comes the fun part! Using your measuring tape and pencil, mark the spots where you want your candles to go. Think about the placement, how you want them to look, and make sure there's enough space between them so the candles don't melt into each other. Once you're happy with the layout, grab your drill and carefully drill the holes. Make sure your drill bit is a little larger than your candle to create a snug fit. Remember, safety first! Wear your protective gloves and take your time,

Step 3: Stain and Protect

Let's give our wooden candle holder a splash of personality! Apply a coat of stain, following the manufacturer's instructions. I usually use a brush to apply the stain and then wipe away any excess. Let the stain dry completely. Now, to ensure our masterpiece lasts, apply a coat of polyurethane. This will protect the wood from moisture and make it more durable. Let the polyurethane dry before moving on to the next step.

Step 4: Add Some Festive Flair (Optional)

Time to unleash your creativity! Want to add some extra sparkle to your candle holder? Here's where you can let your imagination run wild. Tie some festive ribbon around the edges, glue on some holly sprigs, or attach some pine cones for a natural touch. The possibilities are endless!

Step 5: Light Up Your Holiday

Now, the moment of truth! Place your candles inside the holes. Step back and admire your masterpiece! Light them up and let the warm glow fill your home with festive cheer.

Tips and Tricks

Here are a few extra tips to elevate your candle holder game:

  • For a more rustic look, you can leave some of the wood's natural imperfections.
  • If you're using a thinner plank, consider using smaller candles so they don't overwhelm the base.
  • If you're worried about fire hazards, you can use LED candles instead of real candles.
  • Experiment with different wood stains and finishes to find the perfect look for your home.
  • Don't be afraid to add your own personal touch! Get creative and let your unique style shine.

Beyond the Basics

Feeling adventurous? Let's take our wooden candle holder to the next level! Here are some fun ideas to personalize your project:

  • Engraving: Use a wood-burning tool to create intricate designs or personalize it with a message.
  • Painting: Paint a whimsical design on the base of your candle holder, like snowflakes, reindeer, or Christmas trees.
  • Decoupage: Decorate your candle holder with Christmas-themed paper, tissue paper, or fabric.
  • Embellishments: Add a touch of glitter, beads, or faux snow for a magical touch.
  • Multi-Level Holder: Stack several wooden planks to create a tiered candle holder.

Sharing the Festive Cheer

There you have it! A beautiful, personalized wooden Christmas candle holder, handcrafted with love! Now, go forth and spread the festive cheer. This DIY project makes a fantastic gift for friends and family, too. Share your creations and tag me on social media. I love seeing your crafty masterpieces! Happy crafting, everyone!

Share:

Woodworking for Kids: Tools and Techniques for Beginners

Woodworking for Kids: Tools and Techniques for Beginners

Woodworking for Kids: Tools and Techniques for Beginners

Woodworking is a fantastic activity for kids of all ages. It's a great way to unleash their creativity, develop fine motor skills, and learn about problem-solving and perseverance. From building birdhouses to crafting whimsical toys, the possibilities are endless. Let's embark on this exciting journey together and discover the world of woodworking for kids.

Safety First: Essential Gear for Young Woodworkers

Safety is paramount when it comes to woodworking. Before even picking up a tool, make sure you have the right protective gear. Here's what every young woodworker needs:

  • Safety Glasses: Protect those precious eyes from flying wood chips and sawdust.
  • Ear Protection: Power tools can be loud, so earmuffs or earplugs are essential.
  • Work Gloves: These provide a grip and prevent splinters while handling wood.

Tools to Spark Imagination

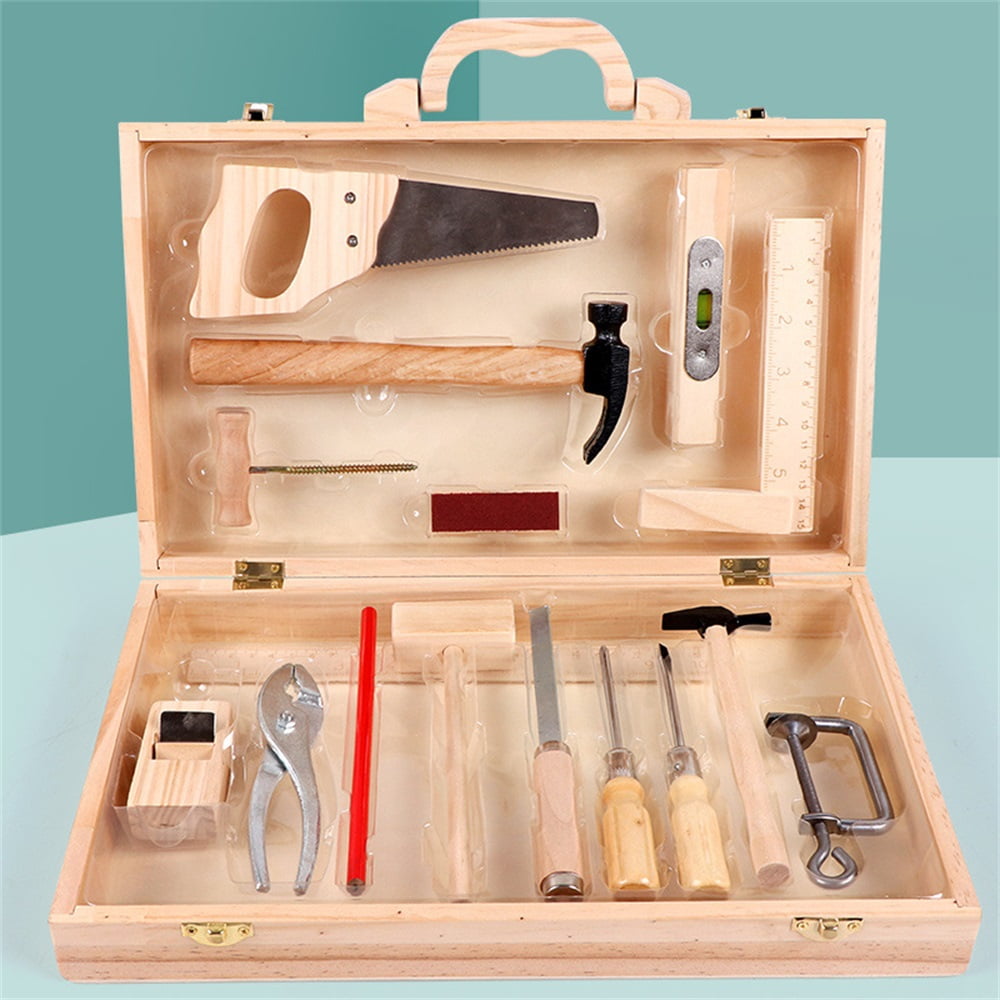
Start simple, and build up your woodworking toolkit gradually. These are some basic tools that are perfect for beginner woodworkers:

  • Hand Saw: A hand saw is a classic tool for cutting wood. It's a good idea to start with a smaller saw for easier control.
  • Hammer: A hammer is essential for driving nails and securing pieces of wood together.
  • Screwdriver: Choose a screwdriver with a variety of interchangeable bits to handle different screw sizes.
  • Measuring Tape: Precision is key in woodworking, so a measuring tape is vital for accurate measurements.
  • Pencil: Use a pencil to mark your wood before making any cuts.
  • Clamps: Clamps are indispensable for holding pieces of wood securely together while you work.

Beginner-Friendly Techniques

Once you've gathered your tools and safety gear, it's time to get started with some simple woodworking techniques. Here are a few easy projects that are perfect for beginners:

1. Building a Birdhouse

Birdhouses are a classic beginner woodworking project. It's relatively simple to construct, and you can personalize it with different colors and designs. This project teaches kids about basic construction techniques like cutting, drilling, and assembling.

2. Crafting Wooden Toys

Let your child's imagination run wild by creating wooden toys. You can make simple blocks, puzzles, or even a miniature dollhouse. These projects involve sanding, painting, and possibly even carving, allowing kids to explore different aspects of woodworking.

3. Making a Picture Frame

A picture frame is a practical project that can be a wonderful gift. You can use scrap wood to create a unique frame, and personalize it by painting, staining, or adding decorative embellishments. This project introduces kids to the concept of joining wood with miter cuts.

The Joy of Woodworking for Kids

Woodworking offers countless opportunities for kids to learn, grow, and express themselves. It's a hands-on activity that fosters creativity, problem-solving, and a sense of accomplishment. So gather your tools, safety gear, and a willingness to experiment, and embark on an exciting woodworking adventure with your child.

Share:

DIY Woodworking: Simple Projects to Try First

DIY Woodworking: Simple Projects to Try First

DIY Woodworking: Simple Projects to Try First

Embarking on a woodworking journey can be both rewarding and fulfilling. The ability to transform raw materials into beautiful and functional objects is a skill that can bring immense satisfaction. If you are a beginner looking to dip your toes into the world of woodworking, it's essential to start with simple projects that will build your confidence and introduce you to the fundamental techniques. This article will guide you through a selection of beginner-friendly woodworking projects that are perfect for first-timers.

Essential Tools and Materials

Before you jump into any woodworking project, it's crucial to gather the necessary tools and materials. Here's a basic list of essentials for beginners:

  • Handsaw: Used for cutting wood to size. Choose a crosscut saw for making cuts across the grain and a ripsaw for cutting with the grain.
  • Measuring Tape: Essential for accurately measuring wood pieces.
  • Pencil: For marking cuts and designs on wood.
  • Clamps: Used to hold pieces of wood together during assembly.
  • Wood Glue: Bonds wood pieces together.
  • Screwdriver: For driving screws into wood.
  • Sandpaper: Used to smooth rough surfaces and remove imperfections.
  • Safety Glasses: Protect your eyes from wood chips and debris.
  • Work Gloves: Protect your hands from splinters and rough surfaces.

As you progress with your woodworking journey, you can gradually expand your tool collection to accommodate more complex projects.

Simple Projects for Beginners

Here are some simple woodworking projects that are perfect for beginners, allowing you to hone your skills and gain confidence:

1. Wooden Coasters

Wooden coasters are a simple and practical project for beginners. They require minimal cutting and allow you to experiment with different wood species and finishes. Here's a step-by-step guide:

  1. Cut the Wood: Choose a type of wood that is easy to work with, such as pine or plywood. Cut four squares of wood to your desired size, typically around 4 inches by 4 inches.
  2. Sand the Wood: Smooth the edges and surfaces of the wood squares using sandpaper. Start with a coarser grit sandpaper and finish with a finer grit for a smooth finish.
  3. Apply Finish: Choose a suitable finish for your coasters, such as a wood stain, varnish, or polyurethane. Apply the finish according to the manufacturer's instructions.
  4. Add a Touch of Personalization: Consider adding a personalized touch to your coasters by burning a design or applying decals.

Once the finish is dry, your coasters are ready to protect your furniture from spills.

2. Simple Picture Frame

A simple picture frame is a classic beginner project that allows you to practice basic woodworking techniques. Here's how to make one:

  1. Cut the Wood: Choose wood for your frame, considering the size and weight of the picture you plan to display. Cut four pieces of wood to the desired length and width of the frame.
  2. Join the Pieces: Use wood glue and clamps to join the four pieces of wood into a rectangular frame. Ensure that the corners are flush and the joints are strong.
  3. Sand the Frame: Once the glue is dry, sand the entire frame to create a smooth finish.
  4. Add a Back and Stand: Cut a piece of plywood to fit the back of the frame and attach it with glue or brads. Add a piece of wood to the back for a stand.
  5. Finish the Frame: Apply a finish, such as stain, varnish, or paint, to your liking.

Now you have a custom-made picture frame to showcase your favorite photos or artwork.

3. Wooden Cutting Board

A wooden cutting board is a practical and useful kitchen accessory that can be crafted with basic woodworking skills. Here's a step-by-step guide:

  1. Choose Your Wood: Select a hard and durable wood for your cutting board, such as maple, walnut, or cherry. Choose a piece of wood that is free of knots and imperfections.
  2. Cut the Wood: Cut the wood to your desired size and shape using a handsaw or a jigsaw. Ensure that the corners are square and the edges are smooth.
  3. Sand the Surface: Sand the top surface of the cutting board with sandpaper, starting with a coarser grit and finishing with a finer grit. This will create a smooth and even surface for cutting.
  4. Apply Food-Safe Finish: Apply a food-safe finish to the cutting board, such as mineral oil or beeswax. These finishes will protect the wood from moisture and bacteria.

Your custom-made cutting board is now ready for use in the kitchen.

4. Simple Birdhouse

A birdhouse is a charming and rewarding project that can bring a touch of nature to your yard. Here's how to create one:

  1. Build the Base: Cut a square piece of wood for the base of the birdhouse. Attach four vertical pieces of wood to the base, forming the walls.
  2. Create the Roof: Cut two triangular pieces of wood for the roof and attach them to the top of the walls. You can use a hinge to make the roof open for cleaning.
  3. Add the Entrance: Cut a round or rectangular opening in the front of the birdhouse for the birds to enter. Ensure the opening is the appropriate size for the birds you plan to attract.
  4. Finish the Birdhouse: Sand the birdhouse smooth and apply a weather-resistant finish to protect it from the elements. Add a perch for the birds to rest on.

Once your birdhouse is complete, hang it in a suitable location in your yard and enjoy the beauty of birds visiting your creation.

Tips for Beginners

Here are some tips for beginners to make their woodworking journey smoother:

  • Start Small: Choose small and simple projects to start with. Don't rush into complex designs that may overwhelm you as a beginner.
  • Practice Basic Techniques: Focus on mastering fundamental woodworking techniques, such as measuring, cutting, sanding, and joining wood.
  • Read Instructions Carefully: Before starting any project, carefully read the instructions and understand each step. Don't skip any steps or assume that you know what to do.
  • Safety First: Always wear safety glasses and work gloves to protect yourself from injuries. Work in a well-ventilated area and use proper tools and equipment.
  • Don't Be Afraid to Ask for Help: If you encounter any difficulties, don't hesitate to ask for help from more experienced woodworkers or seek guidance from online resources.

Conclusion

Woodworking is a rewarding hobby that can bring you immense satisfaction. Starting with simple projects and gradually building your skills will give you a solid foundation for creating more complex and intricate pieces. Remember to prioritize safety, practice your techniques, and enjoy the process of transforming wood into beautiful and functional objects. Happy woodworking!

Share:

Tuesday, 12 November 2024

Free Coffee Table Plans PDF for DIY Enthusiasts

Free Coffee Table Plans PDF for DIY Enthusiasts

Free Coffee Table Plans PDF for DIY Enthusiasts: Build Your Dream Table Today!

Hey there, fellow DIYers! Are you looking to add a touch of personality and practicality to your living room? Look no further than building your very own coffee table! It's a project that's surprisingly achievable, even for beginners. And the best part? You can do it without breaking the bank!

We've got a fantastic selection of free coffee table plans PDF downloads waiting for you. These plans are designed to guide you through every step of the process, from choosing the right materials to assembling your masterpiece.

Why Choose a DIY Coffee Table?

You might be wondering, "Why bother with a DIY project when I could just buy a ready-made coffee table?" Well, here's why crafting your own table is a fantastic idea:

  • Unique Style: Ditch the mass-produced look and create a table that truly reflects your taste. Choose from a variety of designs, materials, and finishes to personalize your piece.
  • Cost Savings: Building your own coffee table can save you a significant amount of money compared to buying one from a furniture store.
  • Sense of Accomplishment: There's nothing quite like the satisfaction of completing a DIY project. You'll be proud to show off your handiwork to family and friends.
  • Fun and Relaxing: Working on a DIY project can be a fun and relaxing activity. It's a great way to unwind and let your creativity flow.

The Ultimate Guide to Choosing the Right Coffee Table Plan for You

With so many amazing coffee table plans available, it can be overwhelming to choose the right one for your needs. Here are some factors to consider:

1. Your Space and Style

Think about the size and style of your living room. A large coffee table might be overwhelming in a small space, while a petite one might get lost in a spacious room. Consider the style of your existing furniture and choose a plan that complements it.

2. Your Skill Level

Don't bite off more than you can chew! If you're a beginner, start with a simpler design. More complex plans often involve intricate cuts, joints, and finishing techniques that may be challenging for a novice.

3. Your Budget

Some plans call for expensive hardwoods or specialized tools. Consider your budget when choosing a plan and selecting materials.

4. Your Available Time

Some projects can be completed in a weekend, while others might take several days or even weeks. Choose a plan that fits your available time and commitment.

Essential Tools and Materials for Your DIY Coffee Table

Before you start building, gather the necessary tools and materials. Here's a general list, but be sure to check your specific plan for details:

  • Wood: This is the foundation of your coffee table! Choose a wood that's suitable for your design, budget, and desired finish. Popular choices include pine, oak, maple, and plywood.
  • Screws and Nails: You'll need these to secure the various pieces of your table.
  • Wood Glue: This helps create strong and lasting bonds between wood pieces.
  • Saw: A circular saw or jigsaw will be needed to cut your wood to size.
  • Drill: A drill with various drill bits is essential for creating pilot holes for screws and for assembling your table.
  • Sandpaper: Use sandpaper to smooth out the wood surface and prepare it for finishing.
  • Finish: Choose a finish that complements your wood and your desired look. Options include paint, stain, varnish, and polycrylic.
  • Measuring Tape: This is essential for precise cuts and accurate assembly.
  • Level: Use a level to ensure that your table is straight and stable.

Free Coffee Table Plans PDF: Download Your Favorite Design Today!

Now that you're ready to build your dream coffee table, here are some resources where you can find free plans:

1. Ana White

Ana White is a renowned DIY blogger with a vast collection of free plans for all levels of builders. Her coffee table plans offer various styles, from rustic farmhouse tables to modern minimalist designs.

2. The Wood Whisperer

The Wood Whisperer is another popular DIY resource with comprehensive plans and video tutorials. You'll find detailed instructions and helpful tips for building stunning coffee tables.

3. Pinterest

Pinterest is a treasure trove of DIY inspiration! Search for "free coffee table plans" and you'll be bombarded with amazing ideas. You can even find plans specific to your desired style or material.

4. Home Depot

Home Depot offers a selection of free DIY plans, including coffee tables. Their plans are often geared towards beginners and provide clear instructions with detailed illustrations.

5. Lowe's

Lowe's also offers a library of free DIY plans, including several coffee table designs. Their plans are known for their simplicity and practical approach.

Building Your Coffee Table: A Step-by-Step Guide

Once you've downloaded your chosen plan and gathered your tools and materials, it's time to build! Here's a general outline of the process:

  1. Study the Plans: Carefully review your plan and understand the steps involved.
  2. Cut the Wood: Using your saw, accurately cut the wood pieces according to the plan's dimensions.
  3. Assemble the Tabletop: Join the pieces of your tabletop using screws, glue, or both.
  4. Assemble the Legs: Construct the legs according to the plan and attach them to the tabletop.
  5. Sand and Finish: Smooth out any rough edges and apply your chosen finish to create a beautiful and durable surface.

Tips for a Successful DIY Coffee Table Project

Here are some handy tips to ensure a smooth and enjoyable building experience:

  • Take your time: Don't rush the process. Careful measurements and accurate cuts are crucial for a well-built table.
  • Use a clamp: Clamps are your best friend when joining wood pieces. They help ensure a strong and even bond.
  • Sand between coats: Sanding between coats of finish helps create a smooth and even finish.
  • Let each coat dry completely: Before applying a new coat of finish, make sure the previous coat is completely dry.
  • Don't be afraid to ask for help: If you encounter a challenge, don't hesitate to ask for help from a more experienced DIYer or a friend who can offer guidance.

Conclusion: Your Coffee Table, Your Way!

Building your own coffee table is a fantastic way to express your creativity, save money, and add a personal touch to your living room. With the right plans and a little bit of effort, you can create a stunning piece of furniture that you'll cherish for years to come. So, download your favorite coffee table plans today and get started on your next DIY adventure!

Share:

DIY Outdoor Firewood Rack Plans Using Recycled Pallets

DIY Outdoor Firewood Rack Plans Using Recycled Pallets

DIY Outdoor Firewood Rack Plans Using Recycled Pallets

Transforming discarded pallets into a functional and stylish firewood rack is a rewarding project that embodies the spirit of upcycling. This guide provides a comprehensive set of plans, complete with step-by-step instructions, to help you create a practical and aesthetically pleasing firewood storage solution.

Choosing the Right Pallet

The first step in your project is selecting the appropriate pallet. Look for a sturdy pallet that is free of any visible damage, such as cracks, rot, or loose boards. The size of the pallet will determine the overall dimensions of your firewood rack.

Pallet Types

There are various types of pallets, each with its own unique characteristics. Here are some common types:

  • Standard Pallets: These are the most prevalent type and are commonly found in grocery stores and warehouses. They usually measure 48 inches long by 40 inches wide.
  • Euro Pallets: These are slightly smaller than standard pallets, measuring 48 inches long by 32 inches wide.
  • Half Pallets: These are essentially half the size of standard pallets, with dimensions of 48 inches long by 24 inches wide.

The type of pallet you choose will dictate the storage capacity of your firewood rack. Standard pallets provide ample storage space, while euro pallets and half pallets offer more compact options.

Required Materials

Once you have your chosen pallet, gather the following materials:

  • Safety Glasses: Protect your eyes from debris and flying particles.
  • Gloves: Ensure safe handling of tools and materials.
  • Hammer: For driving nails and securing components.
  • Measuring Tape: Accurately measure and mark your cuts.
  • Saw: To cut pallet boards to desired lengths. A circular saw or a hand saw will suffice.
  • Screwdriver: For securing components with screws.
  • Screws: Choose appropriate screws for wood-to-wood connections.
  • Optional: Wood stain or paint (for finishing and enhancing appearance).

Step-by-Step Instructions

Follow these steps to create your DIY pallet firewood rack:

Step 1: Preparation

Begin by inspecting the pallet for any loose nails or boards. Remove any loose nails or boards and reinforce the pallet's structure. Use a hammer and nails to secure any loose boards. If desired, remove any branding or markings from the pallet.

Step 2: Cutting the Pallet

Decide on the desired height of your firewood rack. Using a measuring tape, mark the pallet's boards where you want to make your cuts. Carefully cut the pallet boards to the desired length using a saw.

Note: Ensure the cuts are clean and precise for a finished look.

Step 3: Constructing the Framework

Using the cut boards, build a framework to support the firewood. This can be achieved by creating a series of horizontal supports that will hold the firewood logs. Measure the width of your pallet and cut the boards to the desired length.

To create a sturdy framework, attach these horizontal supports to the pallet's existing side boards using screws or nails. Ensure the spacing between the supports is suitable for your preferred firewood size.

Step 4: Adding Stability

To increase the stability of the firewood rack, add vertical support beams. Cut pieces of pallet boards to the desired height and attach them to the horizontal supports using screws or nails. These vertical supports will help prevent the rack from swaying or tipping over.

Note: The spacing between the vertical supports should be proportional to the size of your firewood logs.

Step 5: Finishing Touches

Once the framework is complete, you can apply a finishing touch to your firewood rack. Sand any rough edges to create a smooth surface.

If desired, stain or paint the rack to match your outdoor decor. Allow ample drying time before adding firewood.

Placement and Use

Your new pallet firewood rack is now ready for use. Choose a suitable location in your outdoor space, ensuring it is level and stable. Place the rack in a sheltered area, away from direct sunlight and rain, to extend its lifespan.

Avoid stacking firewood too tightly, leaving some space for air circulation to prevent moisture buildup and rot.

As you add firewood to the rack, rotate the logs periodically to promote even drying.

Conclusion

Transforming discarded pallets into a practical and visually appealing firewood rack is a great way to repurpose materials and add a touch of rustic charm to your outdoor space. This DIY project provides an excellent opportunity to create a personalized storage solution for your firewood while embracing a sustainable and eco-conscious approach.

By following the detailed instructions and tips provided, you can build a sturdy and functional firewood rack that will enhance your outdoor living and serve you well for years to come.

Share:

Search This Blog

Powered by Blogger.

Pages